Wild Rice & Chicken Casserole

20 Aug

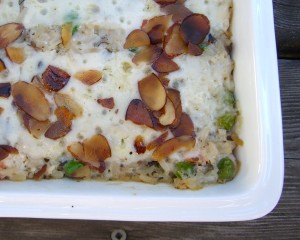
Sometimes when it’s the end of the week and you are left with very few options about dinner, you just have to make a casserole. They are quick, easy and taste good, no matter what you put in them. Whether it be leftovers or just a mishmash of frozen vegetables and rice, they always ALWAYS seem to turn out.

Well, I had one of those days where I had nothing planned for dinner and nothing in my fridge. “Surely…” I thought “there must be something I can make!” I scoured my freezer and pantry and came up with this quick casserole. Lucky for me I had a box of Uncle Ben’s long grain and wild rice and a can of cream of mushroom soup. If you have those two ingredients on hand, you will live to see another day, and your kids will get fed. After you have your basics down, you can change the rest of the recipe how you like. We tend to gravitate towards rice, chicken and broccoli a lot. It’s a pretty common and classic combination. However, this time, there was NO broccoli. (*Side note–I hate frozen broccoli. It is the only vegetable I hate to eat after thawing. It always tastes freezer burnt to me. Am I paranoid or do you guys taste that, too?)
Speaking of frozen vegetables, what a great deal! You get a lot of food for a little price and all those vegetables are typically harvested and frozen within the same day so you know they are fresh. I love having them on hand and throw them into anything and everything when I’m feeling spunky or when I’m in a pinch. Seriously, frozen vegetables are where it’s at.

For this particular recipe, I used my handy dandy frozen peas and carrots. They worked so well and tasted great with all the other ingredients even before it all was baked. But, use what you have on hand! I also topped my casserole with some swiss cheese and toasted almonds for a creamy crunchy bite. After the first bite my husband said “Wow….this is good!” in a surprised tone. He was skeptical at first, but the casserole won him over and he ate the rest for lunch the next day! How do you like that, Gordon? Haha!

I love using the random ingredients I’m left with at the end of the week to make great food my family will eat. It saves money and gives me a sense of accomplishment. So, don’t be afraid to experiment these next few days with the food you think you can’t make anything with. You’ll be surprised at what you’ll come up with! Happy Cooking!

Wild Rice & Chicken Casserole
yield: 4 servings

Ingredients:
1 box Uncle Ben’s Long Grain and Wild Rice
1 can cream of mushroom soup
2 cups cooked chicken, cubed (or any other meat)
1 1/2 cups frozen vegetables
1/2 cup cream or milk
1 tablespoon butter
1/2 onion, diced
1/2 stalk celery, diced
salt
pepper
5 slices swiss cheese (from the deli; or use about 1 cup grated cheese, any kind you have)
1/3 cup toasted slivered almonds

Directions:
Cook box of rice according to packaged directions. In skillet, melt butter and sautee onion and celery over medium heat until softened, about 5 minutes. Once cooked, spoon rice into large bowl. To the rice, add cream of mushroom soup, chicken, vegetables, cream, cooked onion and celery, and salt and pepper. Spread into a casserole dish. Top with cheese and almonds. Cover with foil and warm thoroughly at 300 degrees for at least 30 minutes (and up to 60). Serve with a side salad.

Pizza Stuffed Zucchini

18 Aug
(sorry if this photo looks white and grainy! Blogger is being ridiculous and uploading my photos weird!)

Guess what, friends! I have ANOTHER giveaway coming up next week! Stay tuned for that! It’s a good one you’re not going to want to miss!

Well, summer is coming to a close which means I am up to my eyeballs in fresh zucchini. In an attempt to eat a little healthier and lower my carb intake, I created this handy dandy little 20-minute dinner. Seriously! Only 20 minutes from start to finish. And, I used up my extra large garden zucchini. If you don’t have access to any jumbo zucchinis or friend’s with gardens full of them, pick up some small ones from the store. About 1 per person, or in my husband’s case, 2.

To road map this recipe for you, I sliced my huge zucchini down the center and then in half again. I scooped out the seeds so I was left with 4 skinny zucchini boats–perfect for fillings! Before I filled them, I cooked them in a skillet 5 minutes per side, covered; this gives them a little needed flavor and color. I cooked them enough to be crisp-tender–how I like it. (See recipe tips for softer zucchinis) Then I filled them up with loads of pizza toppings and stuck them under the broiler! Thats it! I did happen to have some cherry tomatoes from my garden around too, so I made a little tomato basil mix for the top. So simple, and so good. It’s like the taste of summer in your mouth. I loved these and so did my husband. My daughter just ate all the cheese off the top! 🙂

Hope you all are enjoying these last few days of Summer before we’re into Fall! (PS- I’ve got some GREAT pumpkin recipes that I’m dying to share with you so fall can’t get here fast enough!)

Pizza Stuffed Zucchini
yield: 4 servings

Ingredients:
2 extra large zucchini from the garden or 4-6 small
2 tablespoons olive oil
1 large garlic clove, crushed
salt
pepper
2/3 cup pizza sauce
1/2 cup sliced pepperoni
4 slices deli ham, julienned
1/2 green bell pepper, sliced
1/4 onion, sliced thin
2 cups grated mozzarella cheese
any other pizza toppings you’d like
1/2 teaspoon oregano
1 cup cherry tomatoes, halved
10 fresh basil leaves, torn (if desired)
salt
pepper

Directions:
Preheat skillet over medium heat with olive oil and garlic. Slice ends off of zucchini and slice down the center lengthwise. Scoop all the seeds out so you are left with a skinny boat shape, about 1/3-1/2 inch thick. (*If you are using large zucchinis, slice in half, this time width-wise so you have 4 ‘boats’ per zucchini. If you are using small zucchinis from the store, you can forgo this step) Sprinkle salt and pepper over prepared zucchinis. Remove garlic from pan. Place zucchinis cut side down in pan and cover. Cook 5 minutes and turn. Edges should be brown. Cover and cook another 5 minutes. Transfer cooked zucchini to a sheet pan. Fill with pizza sauce, desired toppings and cheese. Sprinkle with oregano. Bake under the broiler until cheese has browned. Remove from oven. In small bowl, combine tomatoes with basil, salt and pepper. Top cooked pizza stuffed zucchinis with tomato mixture, if desired.

Recipe TIPS
-I like my zucchini crisp-tender. Meaning it is still a little firm but not crunchy like a totally uncooked zucchini would be. If you would like a softer pizza stuffed zucchini, all you need to do is bake the pizza stuffed zucchinis at 375 for 10-15 minutes (as opposed to broiling). This should soften things up!

Let’s Make WHOOPIE!

16 Aug

Whoopie pies, that is! Haha….couldn’t resist the title! 

The stars started to align a few months ago for me to make these when I experimented with an oatmeal cookie recipe. I started from scratch and took a few guesses with the measurements. Well, after a few months of experimenting, I finally got my delicious, soft and chewy oatmeal cookies down! Man are oatmeal cookies good! They are some of our favorites!

They really are delicious on their own, but I wanted to shake things up. So I went a little crazy and filled these babies with cream cheese filling….thus creating the super awesome over the top whoopie pie.

These cookies have got it all! Soft, sweet, chewy and a slight tang from the filling! I love them cold and they taste even better than the store bought oatmeal cream pies (sorry little debbie!) I might even go as far as to say that they are healthier! And by healthy I mean no crazy unpronounceable preservatives. Ok, healthy is NOT a good word to describe these, but man are they tasty!

Just like making regular cookies, you make your dough and bake them pan by pan. You let them cool a little and then remove them from off the baking sheet. Then you cool them completely and fill them chock full of fluffy cream cheese filling. It’s really an easy recipe but takes a little waiting time. So, if you have the patience, then dive right in. If you don’t, you can make the cookies today, store them in an airtight container and finish them tomorrow. OR (can you see where this is going?) you can make the cookie dough today, bake them tomorrow and fill them the next day. But, I’ll tell you right now the cookies won’t make it to day 3 because they really are that good and you WILL eat them all. Happy Baking, friends!

Oatmeal Cream Whoopie Pies
yield: 48 cookies, 24 pies

for the cookies-
1/2 cup margarine, softened
1/2 cup butter flavored shortening
3/4 cup packed brown sugar
1/2 cup granulated sugar
2 large eggs
1 1/2 teaspoons vanilla extract
3/4 teaspoon baking soda
1/4 teaspoon baking powder
1/2 teaspoon salt
3/4 teaspoon cinnamon
dash nutmeg (optional)
1 1/4 cups unbleached all purpose flour
1/2 cup whole wheat flour
2 1/4 cups rolled oats
(1 cup chocolate chips if you like!)

for the filling-
1-8 oz. package cream cheese, softened
1 teaspoon vanilla extract
3 tablespoons cream
1 1/3 cups powdered sugar
dash salt

Directions:
Preheat oven to 350 degrees. Spray light colored baking sheet (*see recipe tips) with non stick cooking spray. Set aside.
In large bowl, cream margarine, shortening and sugars together until light and creamy. Stir in eggs and vanilla. Scrape sides of bowl and whip 1-2 minutes until light in color. Stir in remaining ingredients until well incorporated. Scoop small balls of dough onto prepared baking sheet. Bake for 8-9 minutes until cookies aren’t shiny anymore and they look slightly underdone. Cool 3-4 minutes on baking sheet and then remove to waxed paper (*see recipe tips) to cool completely.

For the filling, whip cream cheese with vanilla, cream and salt until smooth. Slowly whip powdered sugar into cream cheese until all combined and smooth. Scrap down the sides and whip again.

To assemble, take 1 oatmeal cookie and spread 1-2 tablespoons of filling across the bottom evenly. Top with another cookie. Repeat until all cookies are filled.

Recipe TIPS
-I use a lighter colored baking sheet because the bottoms don’t brown as quickly or become as hard as they would using a non stick sheet.
-I like to put my cookies on waxed paper because it somehow keeps the cookies really soft.
-If you are planning on assembling the cookies at a later date after they have been cooked, place them gently into an airtight container while the cookies are luke warm–this will keep them moist until you’re ready to use them!

WINNER

14 Aug
Thank you to everyone who entered my first giveaway! 
After using random.org, entry #51 was chosen!

Congratulations to shuttle5! 

Please contact me at wastelessfood@gmail.com to claim your prize!

Parmesan Pretzel Bites

13 Aug

Even before I received my samples from Saucy Mama, I knew exactly what I wanted to make– pretzels to dip in some wonderful mustard. I am a big fan of mustard, especially some smokey garlic mustard. After one bite, I couldn’t stop craving a hot dog because after all, hot dogs and mustard are meant to be together. I’m kind of still craving a hot dog…..interesting….

Anyways, previous to this post, I did a pretzel stick recipe to go along with some soup. These are very similar to those except quite possibly the lazier version. I’m always opting for the easy way out. So, I defrosted a few dinner rolls for 2 hours or so, cut them in half, dipped them in a baking soda and water solution and then sprinkled on some salt, pepper, parsley and parmesan cheese. How ridiculously simple is that? I realize that they didn’t get as dark as my last pretzel recipe or even pretzels you’d buy at the ball game, but that’s because most of the dough is covered by cheese so they aren’t going to get as dark. Feel free to make these without anything but salt to get the dark color. Both are delicious with mustard, especially gourmet smokey garlic mustard! Yum.

**Don’t forget to enter the Saucy Mama giveaway! See previous post for details! You have until tonight at midnight (pacific) to enter and tell your friends! Winner will be selected and announced Saturday morning!**


Parmesan Pretzel Bites
yield: 12 bites
Ingredients:
6 frozen dinner rolls
1 tablespoon butter, melted
1 cup hot tap water
1 1/2 tablespoons baking soda
salt
pepper
parsley flakes 
parmesan cheese
Directions:
Defrost rolls for about 2 hours until dough is completely thawed. Cut dough balls into two even pieces. Form into small pillow shapes, if desired. (I was too lazy to do that!) Dissolve baking soda in hot water. Dip dough pieces into baking soda solution and place on greased baking sheet. Brush dough with melted butter and more baking soda solution. Sprinkle salt, pepper, parsley flakes and parmesan cheese over top. Bake at 350 degrees for 12-15 minutes. Serve with mustard.

Island Shrimp Lettuce Cups & GIVEAWAY!

11 Aug
I know you all are dying to know about the giveaway, so let me quickly tell you about this recipe. Basically in a nut shell, there’s a cup of butter lettuce full of sweet coconut almond rice, fresh pineapple, jalapenos, cilantro, coconut & cornmeal encrusted shrimp topped with a coconut milk & lime sauce. They are sweet and savory and are sure to please everyone! My 18 month old absolutely adored the sweet rice and my husband had at least 7 of these cups. And, I’m not even joking.

About the shrimp: I marinated them for about an hour in Saucy Mama’s Lime Chipotle Marinade. Man, is that stuff packed full of flavor! After I marinated them, I coated half in a cornmeal coconut mixture and kept half plain. The breaded shrimp took a nice hot bath in some canola oil and the plain shrimp were quickly seared in a hot pan with a little olive oil. Both were tasty, but we preferred the cornmeal coconut ones. Try them both out and see which you prefer!
Overall, this dinner was pretty easy to put together and absolutely perfect for summer! (Side Note: there are a lot of parts to this that you could break up over the course of your day if you’re busy! That’s what I did!)

Island Shrimp Lettuce Cups
yield: 4 servings

Ingredients:
for the shrimp-
1-1 1/4 lbs shrimp (21-25 count), peeled & deveined
1 cup Saucy Mama’s Lime Chipotle Marinade
1/2 cup cornmeal
1/2 cup sweetened shredded coconut
salt
pepper
oil of choice for frying (canola, vegetable, peanut, any light colored oil)

for the rice-
1 1/2 tablespoons butter
3/4 cup long grain white rice
1 1/2 cups good quality chicken stock
1 large bay leaf
salt
pepper
2 heaping tablespoons granulated sugar
1/4 cup toasted slivered almonds
1/4 cup toasted sweetened shredded coconut

for the coconut lime sauce-
1/2 cup coconut milk
1 tablespoon sugar
zest of 1/2 lime

1 head butter lettuce, leaves removed and washed
1/4 cup cilantro, chopped
1-2 cups diced fresh pineapple
1-2 fresh jalapenos, seeded & chopped
2 limes, cut into wedges

Directions:
In an air tight container, mix shrimp with Saucy Mama’s Lime Chipotle Marinade. Cover and refrigerate until ready to use.

For the rice-
Preheat large pot over medium high heat. Melt butter and stir in rice to coat. Stir in salt, pepper, sugar and bay leaf. Pour stock into pot and bring to boil. Cover and reduce heat to low until rice has softened completely, 20-30 minutes. Once cooked, remove from heat, stir in almonds and coconut. Keep rice covered to stay warm until service.

To cook the shrimp without breading-
Preheat large skillet to medium high heat. Add about 2 tablespoons of olive oil to the pan. Place shrimp into hot pan in one even layer. Cook about 2-3 minutes per side or until shrimp turn pink and opaque. Remove from heat and keep warm.

To cook shrimp with breading-
Preheat large deep skillet to medium high to high heat with 3/4 inch oil. In shallow dish, combine cornmeal, coconut, salt and pepper together. Dip shrimp into mixture, being sure to coat well. (The marinade acts as a really great glue for the breading so be sure to not wipe any of it off!) Place coated shrimp into hot oil and cook 2-3 minutes per side until shrimp are pink and opaque and breading is golden brown. (*You’re going to want to have the oil hot enough for the shrimp to sizzle when they hit the pan, but not so hot that they burn before they cook. You can test one shrimp at first and adjust your stove accordingly.) Remove shrimp to paper towels, sprinkle with salt and keep warm.

To make the coconut sauce-
Mix coconut milk with sugar and lime zest. That’s it!

For assembly-
Scoop desired amount of rice into bottom of a butter lettuce leaf. Top with pineapple, jalapenos, cilantro, shrimp, sauce and more lime juice if desired.

——————————————————-
GIVEAWAY!

Saucy Mama was nice enough to send me some wonderful products–enough for me AND for my wonderful blogging friends/devoted readers!  So take a look at all these goodies you could win!

One lucky reader will be picked randomly to receive all these products.

Included in this prize pack is: Chipotle Mustard, Champagne Honey Mustard, Cracked Pepper Marinade, Parmesan Garlic Marinade, Raspberry Vinaigrette and Hot Wing Sauce. They all are made with high quality ingredients and are absolutely delicious. Marinades and sauces definitely make my life easier when I can’t think of anything to make for dinner!

HOW TO ENTER:
There are 5 different ways you can enter. For #2-5, be sure to leave a comment saying what you did so you get the correct amount of entries!

(1) Leave a comment
(2) Become a follower of GoLoKitchen through Google (see my sidebar)
(3) Become a fan of GoLoKitchen on Facebook (see my sidebar, or login to your facebook and search golokitchen)
(4) Follow us on Twitter (@golokitchen)
(5) If you have a personal blog, write a post about this giveaway with the link to this site. Be sure to leave the link to your site in your comment so I can check validity if you are chosen!

If you have already become followers or fans previous to this contest, still leave a comment saying you are already fans or followers! I want you all to get as many ballots in as possible!

RULES:
This contest is only open to legal residents of the U.S. AND Canada (assuming the shipment will pass through customs…remind me to tell you a funny story about that later 🙂 ).

Be sure to check back Friday for my second Saucy Mama recipe post. 
No entries past midnight (pacific) FRIDAY! 
The winner will be selected and announced Saturday morning! 
Good luck, everyone! 
And THANK YOU Saucy Mama!

Mini Peach Galettes

9 Aug

Well, hello friends! Hope you had a great weekend! We tried to stay cool and definitely ate some killer food at our weekly family get together. (I made minty squares for everyone- dessert that everyone loves!)

Because it is summer and we reside in Oregon, there is delicious fruit galore! Today on the menu: peaches- and lots of ’em! Gordon and I had a slight moment of insanity and picked 20 pounds of peaches the other day! Let me tell you we are all sick of peaches! But out of everything I made, these mini peach galettes and my peach cobbler were our favorites. (Typical, since they are both desserts!)

Now, don’t let the fancy name throw you off. A galette is a french word that simply means freeform and flat crusty cakes. It is similar to a pie but is baked on a cookie sheet instead of a pie plate. It is an easy dessert that sounds and looks impressive, but takes no time and hardly any effort to put together. The more rustic the better! We gobbled these up fast! And, I didn’t have any vanilla ice cream on hand, so fresh whipped cream had to do. But, do me a favor and serve these warm with ice cream! You’ll be glad you did!

Mini Peach Galettes
yield: 4 servings

Ingredients:
pastry for 1 pie, chilled
2 large ripe peaches
1 1/2 tablespoons sugar
1 tablespoon flour (you may need more depending how juicy your fruit is)
dash of salt
1/4 teaspoon cinnamon
1 tablespoon fresh orange juice
1 tablespoon heavy cream
1 tablespoon granulated sugar
1/2 tablespoon cold butter, cut into 4 chunks
vanilla ice cream and/or whipped cream

Directions:
For the filling-
If desired, blanch peaches to remove skins (see recipe tips for how to do this). If you don’t mind the skin, then skip this step. Cut peaches into 1/4 inch dice and pour into bowl. Stir gently with sugar, flour, salt. cinnamon and orange juice. Set aside.
For assembly-
Preheat oven to 400 degrees. Cut dough into four equal pieces. Flour board and rolling pin. Roll one piece of dough into a 5-6 inch circle (roughly). Place on baking sheet. Repeat with remaining pieces of dough. Spoon peach filling into center of dough rounds, dividing equally and leaving a 1 inch border. Fold sides of dough up over filling. Brush edges of dough with cream and sprinkle with sugar. Place one piece of butter in the center on top of the peach filling. Bake for 15 minutes. Reduce heat to 325 and continue baking for 20-25 minutes until pastry is brown and peaches are soft. Cool 5 minutes before removing from pan and serve with vanilla ice cream and/or whipped cream.

Recipe TIPS:
How to blanch peaches: Bring a large pot of water to a rolling boil. Cut a small ‘x’ in the bottom of each peach. Gently drop peaches into hot water for 30 seconds, remove and submerge into ice cold water immediately. Skins should peel right off. Easy!

Mediterranean Chicken & Rice

6 Aug
Here is some interesting information that I need your opinion on: I am thinking of switching URL’s to something easier to remember like “lauren’s lifestyle” or something along those lines. I’m just so indecisive that I can’t decide what to do or when to do it, so tell me what you think of the name, if you like or don’t like it better than golokitchen, etc. etc. It would really help! 
Also, don’t forget to see what I’m up to on twitter (@golokitchen) and make sure you check out the GoLoKitchen facebook fan page!
Now, onto this delicious chicken! I have been meaning to post this recipe for a while now, but I kept forgetting. It wasn’t until today that I found all these photos that I took a few weeks ago for this recipe. So, without further ado, I give you a delicious and healthy dinner that I call simply Mediterranean Chicken & Rice. 
I don’t remember this dish as vividly as other ones because it’s been a while, but my husband certainly does. He scarfed this one down and then took the leftovers to work the next day for lunch. Mediterranean cuisine is very different from our go-to day in and day out meals. We usually go for Southwest and Italian. I wanted a change from the ‘norm’ and this was the ticket! The kalamata olives, sun dried tomatoes and lemon juice were just delicious together and made a great addition to the sauce. I like acidity, so I squirted in lots more lemon juice. The fresh parsley was a nice touch to round out the dish. All in all, a fabulous meal that came together in about 30 minutes. A great summer meal and a great way to switch things up! 
*I didn’t have any artichoke hearts on hand to toss in, but they would be a perfect addition. (I actually meant to pick some up from the store and completely overlooked it, even though it was on my list! How crazy am I?)
Mediterranean Chicken & Rice
yield: 4 servings
Ingredients:
4 tablespoons olive oil, divided
2 large chicken breasts (sliced in half or pounded out and cut in two–you want 4 cutlets)
salt
pepper
1/4 cup all purpose flour

1 small onion, diced
4 cloves garlic, minced
1/2 green bell pepper, chopped
1/3 cup sun dried tomatoes packed in olive oil & herbs, chopped

1/4 cup kalamata olives, halved
1 bay leaf
1/2 teaspoon oregano
lemon juice, to taste
1/2 cup chicken stock or white wine
splash of cream (1/4-1/2 cup)
fresh parsley
more salt and pepper to taste
cooked white rice

Directions:
In large skillet, preheat 2 tablespoons olive oil over medium high heat. Stir salt and pepper into flour. Coat chicken in flour and cook in hot oil until browned but not necessarily cooked. Remove chicken from pan and set aside. Pour in remaining 2 tablespoons olive oil in same pan and reduce heat to medium. Saute onions, garlic, green pepper and sun dried tomatoes until onions have softened, 5 minutes. Stir in olives, bay leaf, oregano, lemon juice and white wine or stock. Place chicken breasts back in to pan. Cover and cook 5-10 minutes. Reduce heat and stir in cream, parsley and more salt and pepper. Serve over warm rice with lemon slices.

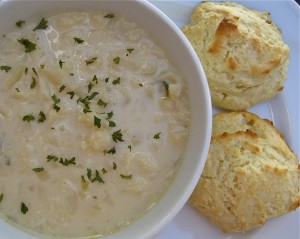
Cream of Cauliflower Soup & Buttermilk Biscuits

4 Aug
Guess what everyone! I finally figured out how to link the GoLoKitchen Facebook fan page to my site! I’m really not all that technically savvy. Can you tell? It is located right under my wonderful followers (thanks, guys! 🙂 ) Anyways, check it out and do me a favor: press that pretty little ‘like’ button. It would do my heart good. Thank you.
This soup is a classic recipe-one I remember my Mom making on cold rainy days. Growing up, I always walked to school, so when it was bad weather, I most likely braved the storm and froze all the way home. But, on those awful days, when I walked in the door, I always smelled onions and butter cooking or onions and olive oil cooking. It is one of those memories that I will always remember, one I automatically link to home. I love my Canadian home and all the people that live there. I also love it here too. So, either way I look at it, I can’t win. However, I can do what I can to get the best of both worlds. And if that means making a bunch of my Mom’s recipes, then so be it. 
To be quite honest with you, there is no recipe for this soup–at least one I’ve never seen. And to be frank, I don’t remember everything my Mom put into this. So, I was flying by the seat of my pants come dinner time. Lucky for me that’s when good things and good ideas pop into my head. Now, this didn’t quite taste like the original, but it was still delightful. The flavor was creamy and mild and didn’t really taste a whole lot like cauliflower. My daughter ate it up and so did my husband (a man who is very hesitant around cauliflower). So, for all you cauliflower haters out there, give this soup a chance. And, for you other folk, make this and be excited for October when I share my Grandma’s cauliflower recipe (it’s very simple and involved a lot of cheese). Seriously, you should be excited because cauliflower really can be that good. Just in time for the holidays, you lucky people!
Now, the biscuits were just something I whipped up to have on the side of the soup. Because it’s been a hot summer I hadn’t made biscuits in a very long time, (meaning I was too hot in my un-air-conditioned apartment to even think of turning on the oven) so when I sunk my teeth into a fresh one, it was almost like a reunion of sorts. “WowI have missed you old friend.” 
Note to self: make more biscuits. 

They are pretty little devils that are just delicious and full of carbs. My favorite. Add a little butter and I’m happy as a clam. 
Moral of the story: Soup = good. Biscuits = good. Soup + Biscuits = one happy full family! 
Enjoy!
Cream of Cauliflower Soup
yield: 4 entree portions
Ingredients:
2 tablespoons butter
2 tablespoons olive oil
1 large onion, diced
1/4 cup all purpose flour
5 cups good quality chicken stock
1 large head cauliflower, cut into small florets
1 bay leaf
salt
pepper
1 cup cream or half & half
Directions:
In large pot, heat butter and olive oil over medium heat. Saute onions until soft and translucent, about 5 minutes. Sprinkle flour over onions and stir to create a paste. Cook 2 minutes. Slowly whisk in chicken stock and increase heat to high. Soup should thicken slightly. Stir in cauliflower, salt, pepper and bay leaf. Simmer lightly with lid cracked for 30 minutes or until cauliflower is soft. Reduce heat to low, remove bay leaf, stir in cream and adjust seasonings to your taste. Top with parsley if desired. Serve with biscuits.
Recipe TIPS
-I’ve told you this many times before, but once you add in your cream or half & half, be sure not to boil the soup! Bad things will happen.
-I had to add in quite a bit of salt to my pot of soup to make it taste great, so don’t be afraid to sprinkle in more!
Buttermilk Biscuits
yield: 12 biscuits
*this is my cinnamon buttermilk biscuit recipe minus the cinnamon
Ingredients:
2 cups all purpose flour
2 teaspoons baking powder
1 teaspoon salt
1/3 cup sugar
1/3 cup cold butter, cubed
1 cup cold buttermilk or 3/4 cup whole milk

Directions:
Mix all dry ingredients together in large bowl. Cut in cold butter until its the size of small peas. Stir in buttermilk until batter is all moist. Cut into 12 biscuits or drop onto greased baking sheet. Bake at 400 degrees for 15-20 minutes.

My New Favorite Salad & Dressing

2 Aug

Hi, friends! Did you guys have a good weekend? I sure did! Complete with more celebrations and fattening food. Sunday was a little anniversary of sorts: August 1st is the day that my husband asked me to marry him! (So glad I said yes! He’s wonderful!) Anyways, we were eating pretty rotten stuff over the weekend so to lighten things up, I’ll be making this salad today and probably tomorrow! Last week, I ate this salad three times for lunch. It’s so easy and delicious.

Don’t let the apples fool you. Their sweet taste and crunchy texture are perfect with the rest of these ingredients. I used to be an apple in salad hater once upon a time, but I took a bold move a few weeks ago and tried it and ended up loving it! Also, this salad ends up being a great option for those hot muggy days and it’s very low in carbs so it’s good for your waist line.

Give it a whirl and let me know what you think! And, don’t forget to check out my updated links/pages above!

New Favorite Salad
yield: for 1 person

Ingredients:
for the salad-
2 cups lettuce or baby spinach
2 slices garlic & herb deli turkey
2 tablespoons toasted, chopped pecans
1/3 fuji apple, diced
1-2 tablespoons shaved parmesan cheese

for the dressing-
makes enough for large dinner salad
1 clove garlic, finely minced (if I was making this for my husband, I’d do half a clove–its garlicy stuff)
2 tablespoons maple syrup, honey or something sweet
1/4 cup balsamic vinegar
1/3 cup light flavored olive oil or canola oil
salt
pepper

Directions:
Pour all ingredients for dressing into a leak proof container or into the bottom of a bowl. Shake or whisk until dressing has emulsified. Set aside.
Make salad by placing all ingredients into a bowl or onto a large plate. Top with desired amount of dressing.